DrumThrash Logo Icon
DrumThrash Drum Machine Software for PC
 

Setup and getting started

After guiding you through the DrumThrash installation process we'll go through the steps needed to set up your environment, so you can start programming a drum beat. Topics we'll cover are, installing a DrumThrash license, setting a sound device, using the quick start, setting the view, and using the Follow Timeline feature.
Installation
Installing a DrumThrash license
Uninstall
Setting a sound device
Startup options
Quick Start
Setting the view
Follow Timeline

Installation

Setup Wizard dialog
Once you have downloaded DrumThrash setup file you can double-click to start the installation.
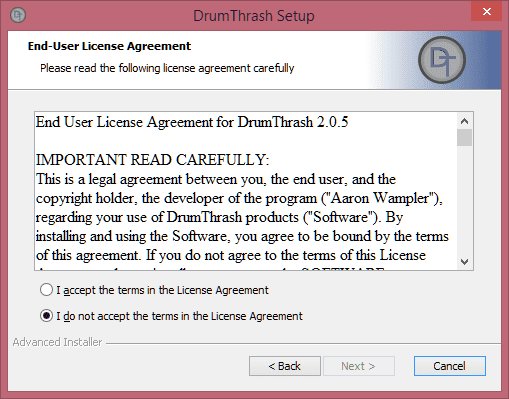
Setup Wizard license agreement
Read the terms of the license, check the "I accept the terms in the License Agreement" box, and click Next to continue.
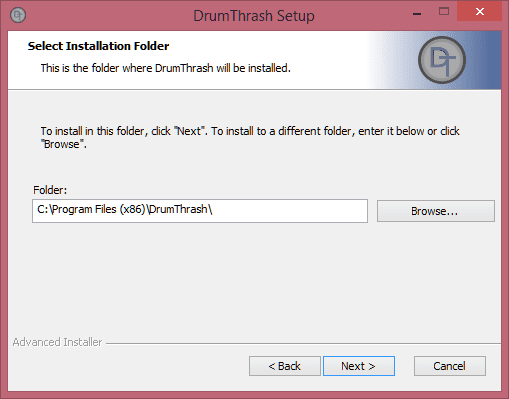
Setup installation folder
Select a folder that the program will be installed to. Make sure you have enough hard drive space. 200 mb is required.
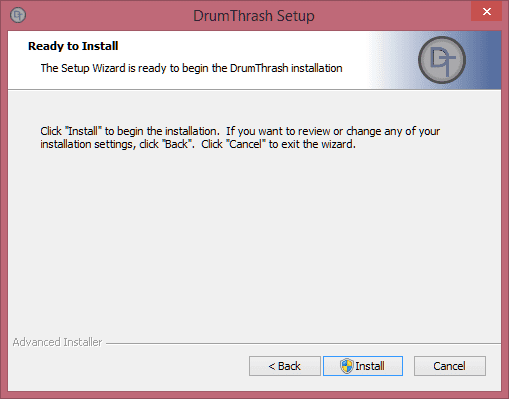
Setup Wizard install
Click Install and wait for the process to finish.
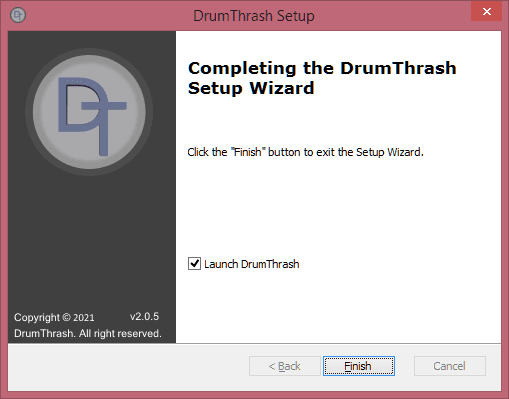
Setup complete
Once the setup wizard has finished you can check the box next to "Launch DrumThrash" to launch the software immediately.
Click the Finish button.

The first time DrumThrash starts you will be presented with a demo project. Press the play button or spacebar to start playback.
Uninstall drumthrash

Installing a DrumThrash license


DrumThrash has a trial version. This means that the software is available to you for free with limited functionality. You are entitled to evaluate the software for up to 10 days without obligation to pay. After 10 days, if you decide to keep the software, you must register your copy with us. After purchasing DrumThrash a license key will be sent to you by email allowing you to unlock all program features.


You can purchase a license key for DrumThrash at: https://www.drumthrash.com/purchase

Installing a license key


Once you have purchased a copy of DrumThrash from the website you will be sent a license key via email. Start DrumThrash and click the Install License button. Enter the License key that we e-mailed to you and click the install button.


Sometimes emails will show up in the spam folder. Make sure to check your spam folder in your email.


You can activate 1 DrumThrash license on a maximum of 3 computers.


To activate a license select Install license from the Help menu
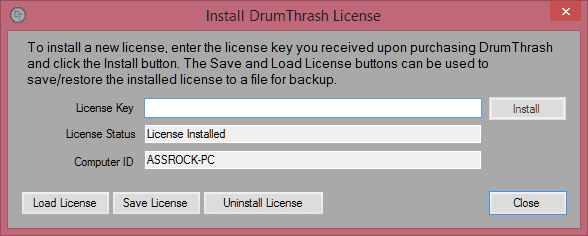
Install license

Authentication error - and unexpected error occurred while authenticating your license key.


1. Check if you are connected to the internet.

2. Check if your firewall/virus scanner is not blocking  the DrumThrash connection to our web server. Most firewalls/virus scanners have a safelist where you can manually add applications.


If you are unable to get DrumThrash to connect to the internet send and email to support@drumthrash.com

Unistall

 
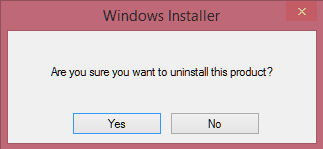
DrumThrash does not provide a self uninstaller. You can use the Windows Control panel to remove the software.
Remove user settings

When removing the software you will be given two options.


This will remove layout and color scheme.


Leave this option checked if you are going to move the license to another computer.


Project, pattern and kit files will not be deleted or removed. The include drum samples will be removed from the program's installation directory.
Setting a sound device

 
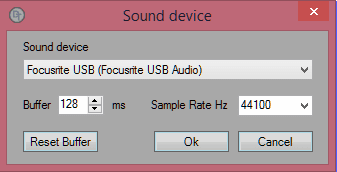
Open the Sound device dialog from the Tools menu to select a default sound card.
Sound device dialog
Sound Device: This is the default sound card DrumThash will use.

Buffer in milliseconds
: The lower the buffer the more responsive playback will be.
If you are experiencing audio breakups try reducing simultaneous hits. If you are still experiencing audio skips, increase the buffer size.

Sample Rate Hz
: The main mixers playback sample rate. Default 44100Hz

Note:
  When changing the default sound card you may need to restart DrumThrash before the changes take effect.

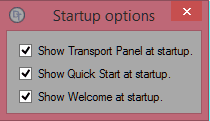
Startup options

 
Selecting an option will start the dialog every time DrumThrash starts.
Startup options
Show Transport panel at startup: Opens the Transport panel when DrumThrash starts.

Show Quick Start at startup:
Opens the
Quick Start dialog when DrumThrash starts.

Show Welcome at startup:
Opens the Welcome screen when DrumThrash starts.

Quick Start

 
The Quick Start dialog allows you to quickly access previously opened projects or create a new project.
Quick start
To open the Quick Start dialog go to the Help menu and select Quick Start.

Open Recent: Opens a recently used project.

Open Project:
Opens a dialog to browse the hard drive for DrumThrash Project files.


New project:
Opens the New Project dialog.

Cancel:
Closes the Quick Start dialog.

Show this at startup:
When checked the Quick Start dialog will be displayed every time DrumThrash is started.  This can be changed using the Startup options dialog.

Setting the view

 
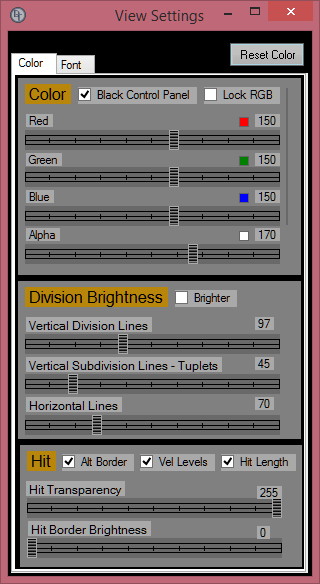
There are many options available allowing you to personalize the view. Select the View Settings button on the View toolbar or select the option from the View Menu.
Visual hit length toggle button

Color: Set the color of panels.

Checkbox - Black Control Panel - Force the color of the Controller panel to use black.

Checkbox - Lock RGB - Locks the red, green blue sliders to the same value.


Division Brightness:

Checkbox - Brighter - Use brighter division lines.


Hit:

Checkbox Alt Border- Use an alternate border for hits.

Checkbox Vel Levels - Show or hide hit velocities

Checkbox Hit Length - Display the actual playback length of hits.


Reset Color: Resets all colors to default.

Visual hit length toggle button

Selecting the Font tab allows you to change font sizes for the Kit, Function, Mixer, and Timeline Panels.


The Auto color option will try to calculate the best font color acording to the panel color. Select Black or White to force using the font color.


Reset Font: Resets all fonts to default.
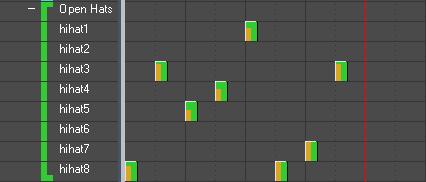
Select Visual Hit Length from the View menu or click the Visual Hit Length button on the View toolbar to display the actual playback length of hits.
Visual hit length toggle button
Visual Hit Length disabled:
Visual hit length disabled
Visual Hit Length enabled:
Visual hit length enabled

Use the Show/Hide Hit Velocity button on the View toolbar to show or hide hit velocities.

Hit velocity button
Show Hit Velocity
Show hit velovity
Hide Hit Velocity
Hide hit velovity

Follow Timeline

 
Follow or "auto scroll" the Event panel when the current measure is out of view.
Follow enabled

Follow Enabled:

Follow disabled

Follow Disabled:

To change Follow options click the Follow settings button on the Action toolbar.

follow settings button
Follow settings

Follow options are:


Stop Following While Editing: When this option is enabled any action done on the Event panel or the Controller panel will stop auto scrolling. When disabled the Event panel will continue to auto-scroll regardless of user action.

Copyright © DrumThrash 2024, All rights reserved
DrumThrash Logo Icon
Facebook
Twitter
Youtube